I read Robert Pirsig’s famous novel when I was a teenager. The bits and advice about methodical working styles stuck with me. I’m not OCD about my workspaces, but I do tend to make project-based clearings and step-by-step layout of parts to keep myself on-track. I even used these methods back in the days when I was doing paste-up production in the pre-computer era.
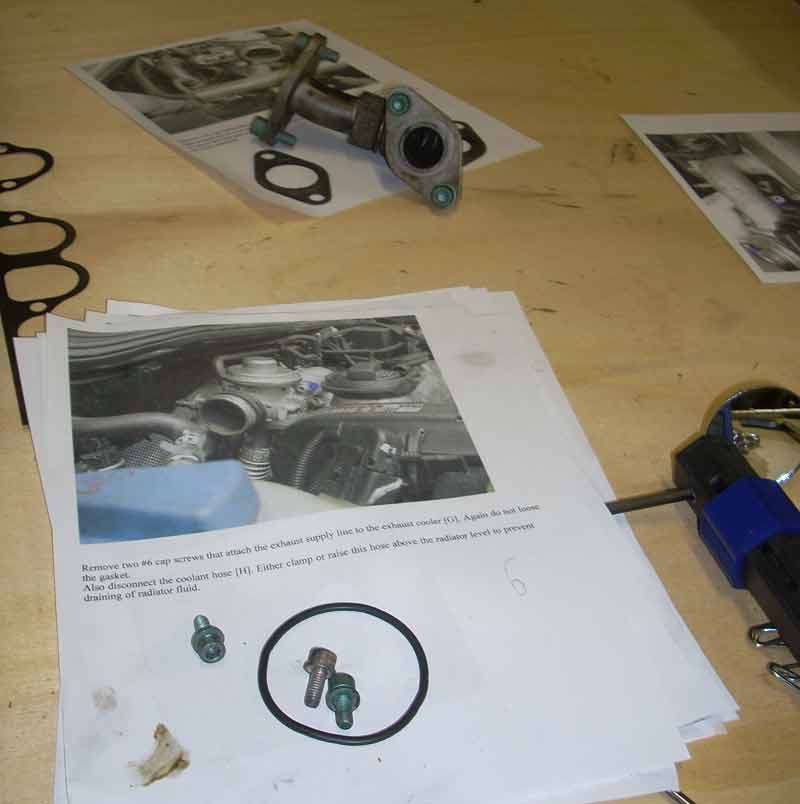
For my current EGR & intake manifold cleaning, and EGR cooler pipe replacement job I put the Jetta on the lift and created a large work-table in front of it with two 55 gallon drums and a large sheet of plywood. I printed out two “how to” PDF’s from tdiclub.com and stacked them on the lower left side of the table. As I pulled off parts I laid them atop their respective sheets, and numbered the sheet. I laid them out right-to-left, and bottom-to top along the table (backwards for a western reader that is.) This way when the time came to reassemble the car I start at the upper left, and then worked my way through the steps in an organized fashion. Outside of that workspace may be abject chaos, but within it, all is perfectly ordered.
This describes my whole life pretty well actually! 😉
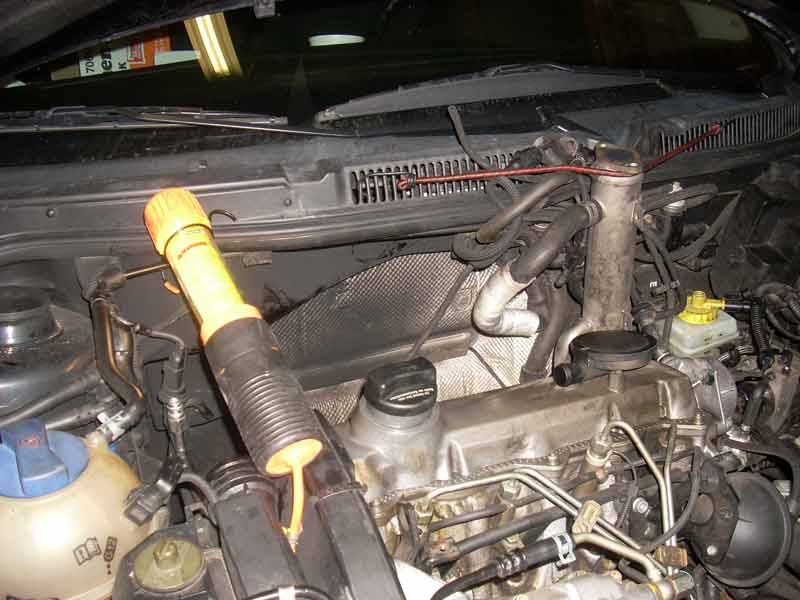
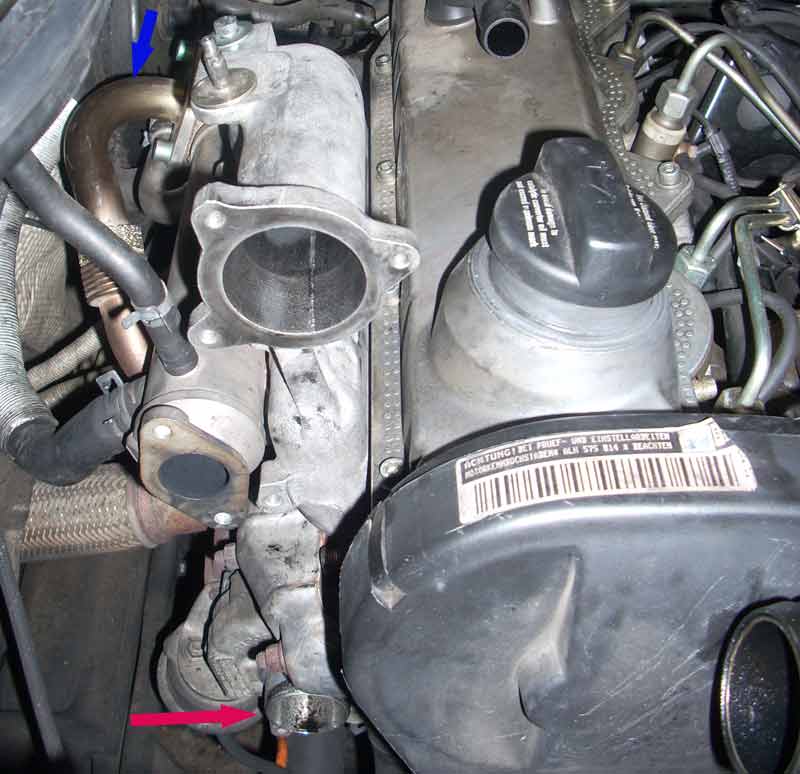
Tonight after dinner I was finally able to start the reassembly. I’m still missing ONE part, so I can’t drive the car tomorrow, but I was able to get through the really hard work tonight. I’m so glad that: 1. I’ve done this job before, and 2. I put the car on the lift. Last time I did it while it was parked on the ground and had two things that drove me crazy. One was leaning over the car for so long while working bolts way at the back of the engine. The other frustration was re-attaching the intake pipe at the turbocharger, which is way down on the back of the engine. By putting the car on the lift I was able to raise it and tackle this job from underneath much easier than from above.
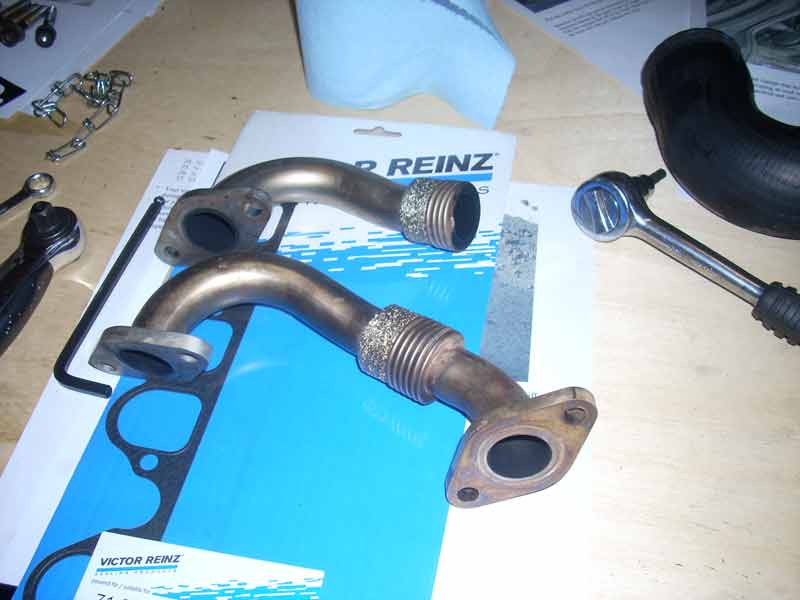
I picked up a “new” EGR cooler intake pipe from a local VW wrecking yard to replace my cracked one, along with a new intake manifold gasket. The only thing I’m missing is an o-ring for the intake manifold side of the EGR. I’ll stop by NAPA near my office tomorrow and grab one.
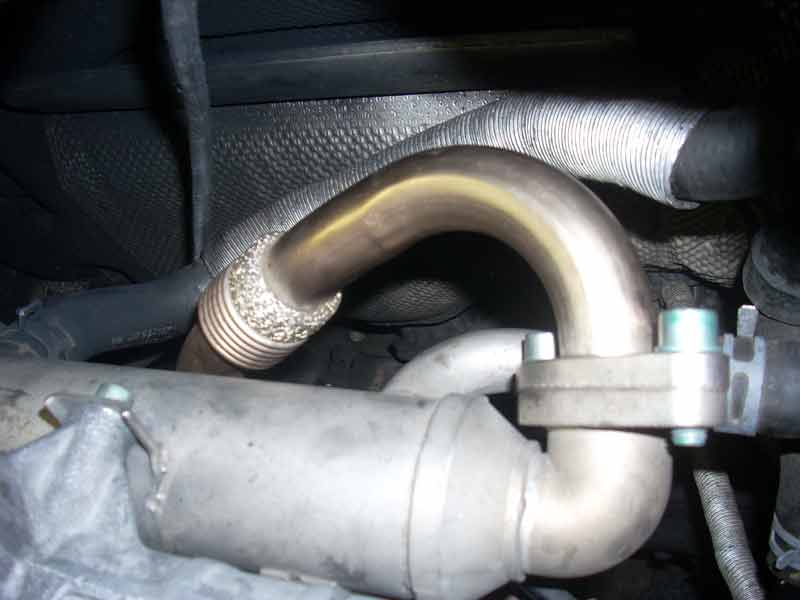
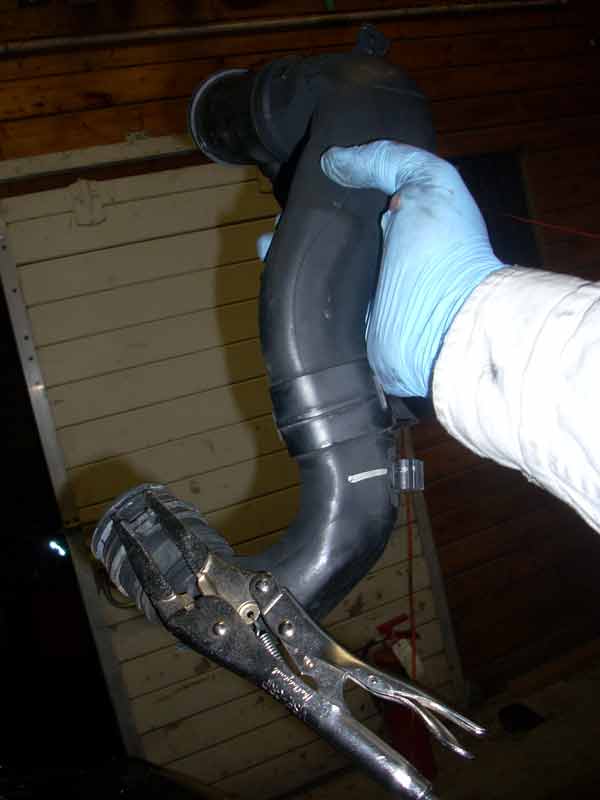
The issue last time was reaching down and re-attaching that hose clamp you see at the bottom of the intake pipe. Threading that puppy down there sort of makes getting your arm down there, with pliers in hand, rather difficult. By lifting the car a bit, I was able to reach up from below and snap it on pretty easily.
So all the really nasty bolts-in-mirrors and thread-arms-through holes jobs are done. Once I can source the proper o-ring I should have the car running again in a matter of minutes, as I just need to install the EGR, the EGR cooler outlet pipe, the rest of the intake system (two hoses and the air-cleaner box), some vacuum hoses, and the engine cover.