I’ve been trying to figure out how to get the numberplate back on the nose of the 65E for a while. It was removed by a body shop, Queen City Auto Rebuild in Redmond in the process of fixing my ding in the bonnet from a parking lot mishap last year. To be honest I’m really disappointed in the job Queen City Auto Rebuild did on the car. They came highly recommended by Seattle Jag Club members, and the shop owner assured me that he would treat the car as he would his own (he has a Series 1 E-type as well.) In reality however the job was completed in as minimal a fashion as possible. The dent was fixed, but the collateral damage inflicted and promises broken added up to an overall unsatisfactory experience:
The numberplate was removed and thrown away (I’ve had to reconstruct it from photographs.) The chrome ring around the headlight was thrown away… I specifically asked for it back because my friend Doug Martin was going to use it as a template for some s1.5 headlight mod project. I was promised some touch up paint, which I never received. They blended the paint as far up as the windscreen (and they damaged the de-mister under the dash at some point doing that) but didn’t bother to spray the bonnet nose, which could REALLY use it, as it has plenty of road damage and some long-standing paint bubbles from the original restoration. I’ve subsequently found some loose bolts in the bonnet assembly too, which I assume is a result of their work too. Basically they did as little as they could. The Adjuster/Estimator who came out from the Insurance company told me they would cover a full respray on the bonnet, so it wasn’t like Queen City HAD to play it cheap. Finally… they promised to make me a new numberplate, which they never did. Lots of promises, all of them broken. Oh well. Hopefully there will never be a next time, but if there is I’ll bring it elsewhere. But enough of that…
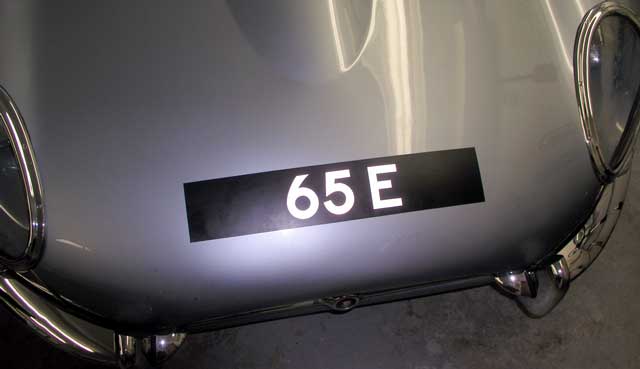
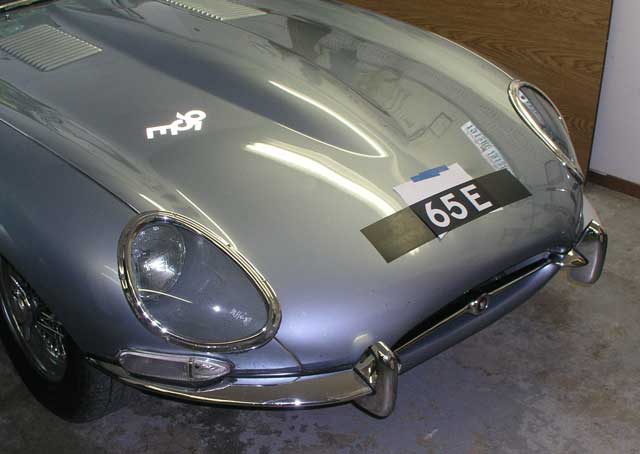
I drove around with it “naked” for many months. On the one hand the paint needed the time to properly cure. On the other hand I wanted to see if I liked it better. I decided that I didn’t like it. Without the “distraction” of the numberplate, the paint damage and flaws on the nose suddenly stood out. Even Paul Wigton, who normally rails against the Brits for despoiling the bonnet of an E-type with a license plate admitted that my car looked funny without it.
My friend and trusted engine rebuilder Geoff Pickard brought me back a genuine English plate from the UK after his last trip there. He brought back both the plate and a set of numbers. They were “proper numbers” (Geoff is English, therefore everything MUST be “proper”) but while being proper, they did not match the font of the original. I mounted the plate itself on the car earlier this month but had yet to find the correct lettering. I had enough photos that I could reconstruct it, and so I shopped around for either the identity of the font used, or some place to take my reconstruction (which I had as a TIFF, a JPEG, and a raw PostScript file) and output the letters in some adhesive-backed vinyl. I never did ID the font (hard to do with just two numbers and a letter), and no sources were ever found to create the letters for me… at least not at a reasonable price.
Then I remembered something.
I know how to do this already. I actually used to be a Graphic Designer, and in the olden days Before Computers (aka “BC”) we actually used our hands to make stuff. Odd I know. The afore-mentioned PostScript programming language of course changed that industry forever, but when I learned the business, there was still craft involved. I spent many an hour in college creating comps by hand. So one day on my way home from work I stopped at a big Fred Meyers and picked up an X-acto knife, some scissors, and after hunting all over the store for something adhesive-backed that would do the trick, I found some mailbox/house address stickers… some blank ones without lettering on them. They were white, but also reflective… and hopefully will make good lettering for me.
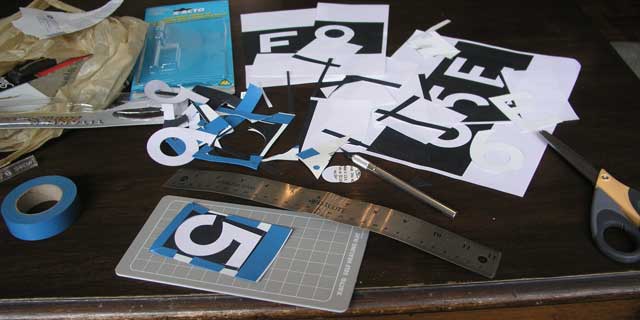
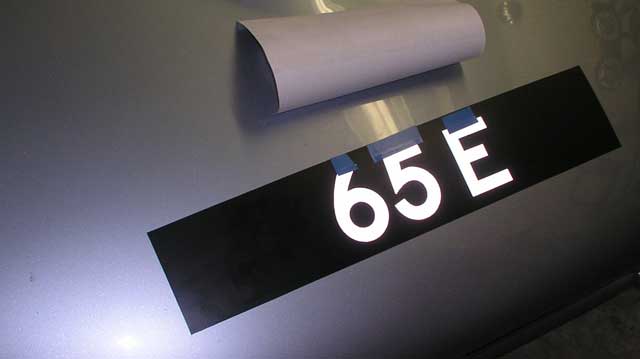
Before I left work this week I dumped my PostScript image file to the printer three times to create a set of templates for the job. I figured I’d need one for lining it up on the car correctly and one for use in cutting, and a spare should I screw up. Good thing I did because I did screw up… the “5”:
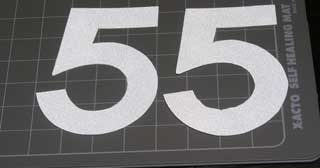
The bad one above is on the right. You see it is very hard to cut a smooth radius curve with a knife, the better tool is scissors, but scissors are really bad for cutting inside corners, and impossible to cut negative space… the term in typography is a “counter”… but to your average person it is a “hole.” Cutting precise, curved, or in this case round holes is very hard. The “6” came off well, on the first try, but the “5” looked a little ragged. The “E” was easy.
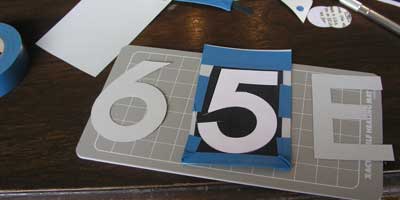
Characters cut, I then went out to the garage to put them on the car.
Using the last remaining printout of the reconstruction, I placed it on the car with a taped “hinge” on top. This would allow me to flip it up and down and check the placement of the lettering underneath prior to sticking them down permanently. I also used tape to hinge the individual characters down, which allowed more precise placement.
I’m pretty happy with the result, and feel even better for having done the “65E” portion by myself. Let’s hope it stays on OK.
Good job – and good thinking about going back to “the old ways” to do the job correctly. It’s really a shame that the body shop did such a shoddy job and did not fulfill their promise(s).
Thanks. It was nice to know I still had the skills!
As for Queen City, in their defence, they DID fix the dent in a competent fashion (at least from appearances… there could be a bondo nightmare under there for all I know!), they just didn’t live up to their promises. If they weren’t going to follow through, they should not have said all those things.
–chuck
Hope Queen City fitted that new left-hand headlight chrome successfully.
The original was undoubtely ‘fettled’ at the factory for fit. Installing a
totally new unit can be quite an exercise.
George K.
Thanks George. It appears to be OK. I’ve taken it off and replaced it once, just to check the fit, and they did do that right.
Any flaw there I’d lay with Jaguar though… this is a crap design, especially when you compare it to a D-type. The D-type’s covered lights look so much nicer. The E-type’s look typically “cheap” and designed to cover flaws in rushed bodywork.
–chuck