OK, so it is a miserable rainy day here, I might as well tackle my steering (again) which has two problems:
1. It was recently rebuilt, but has free play on the inner tire rod end on the driver’s side(?)
2. I could only get 11 of the 12 bolts that mount it to the car installed last time.
I don’t know what caused #1. BUT I just discovered the cause of #2… ME. I am an idiot.
I thought maybe the fresh paint on the rack prevented the bolt from going through the hole, but indeed it was all my fault. Now that the rack in on my workbench it is plainly obvious that the driver’s side MUST be bolted first. The passenger side bolt hole on that particular bolt, is elongated. Guess which one the Moron Mechanic here did first?
That problem sorted (I still removed the paint just for good measure) I’m on to the inner tie rod end.
The free play is hard to describe, so I took some movies. Of course, it takes two hands to show the free play and one to hold the camera. I only have two hands… so the camera was hanging from my neck and wobbles even more than the tie rod. Thankfully there is sound so even if you can SEE it wobble, you certainly can HEAR it. You will need “QuickTime” to view these short movies (made with my still camera).
First, here it is on the car: Inner Tie Rod Wobble on the Car.
Here is another try at an ON-Car look: Inner Tie Rod Wobble On Car.
Here it is off the car and on the workbench (sorry, the camera wobble is REAL bad!) with the tie rod boot removed: Inner Tie Rod Wobble Off The Car.
I THINK I just need to bend back the lock tabs and tighten this puppy up, re-bend and I should be good to go… The problem is, those nuts are HUGE. I have no wrench, even adjustable ones that are this large. 🙁
Update: 2pm I grabbed a kid to hold the camera, so here is a MUCH better, no-wobble movie of the wobbling inner tie rod end.
Update: 5pm I went to a hardware store and bought a GIANT adjustable wrench. It, plus my largest previous adjustable allowed me to get the nuts off and adjust the wobble out of the inner tie rod end. Whoo hoo!
Update: almost midnight!
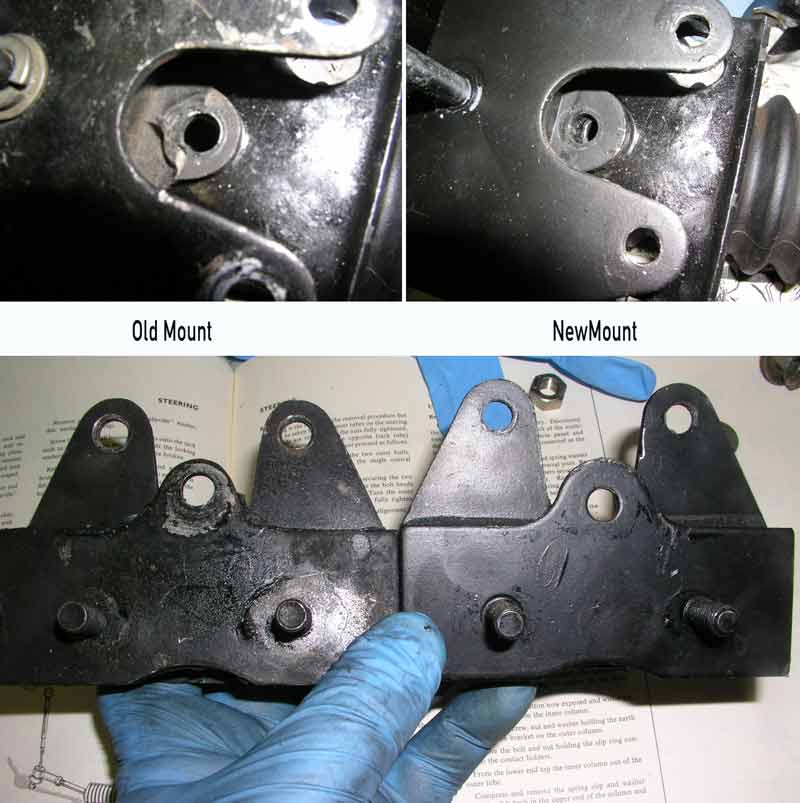
Well… I guess I’m not an Idiot after all. Take a look at that closely. You will note that my new mounts are slightly different than my old ones. What is really odd is that the passenger side one does not have this issue.. It fits fine. Go figure.
Perhaps the old rack mount has been modified? Well so has my new one now! A little time with the Dremel tool and…
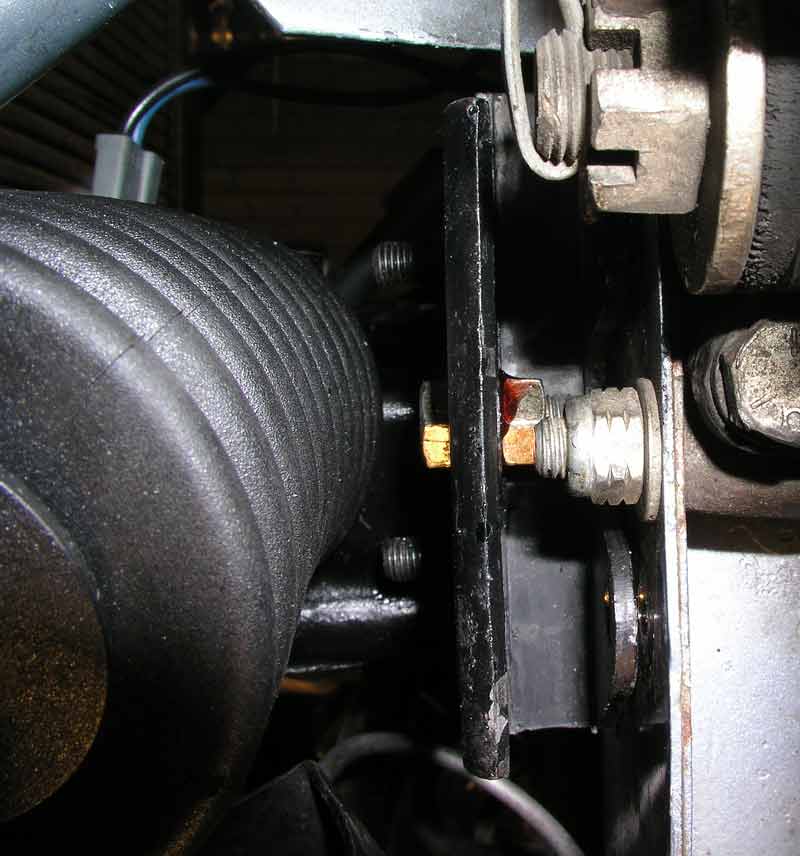
The rack goes on, and it fits to the mounts, AND the two short bolts go on. Above is the driver’s side bolt. This is the one that would not go on before. Now it fits great. No amount of juggling would allow me to get both a washer and a nut on that bolt, so once I got the nut on, I placed a drop of thread-locker on there for good measure and tightened it up. But of course not before I did this:

That is the passenger side short bolt. I didn’t tighten ANYTHING until after I got both of these damn bolts back on. Then I tightened them, driver’s side first. Then the back long studs got bolted, then the four front short studs, then the four safety bolts. The last one of these, the long one on the driver’s side was a real PITA to get back on, but it eventually went in.
I put the radiator fan back on, the outer tie rod ends on, the wheels back on… then dropped the car back down to earth again. Unfortunately it was very dark and too late for a test drive. Oh well. Maybe later this week.
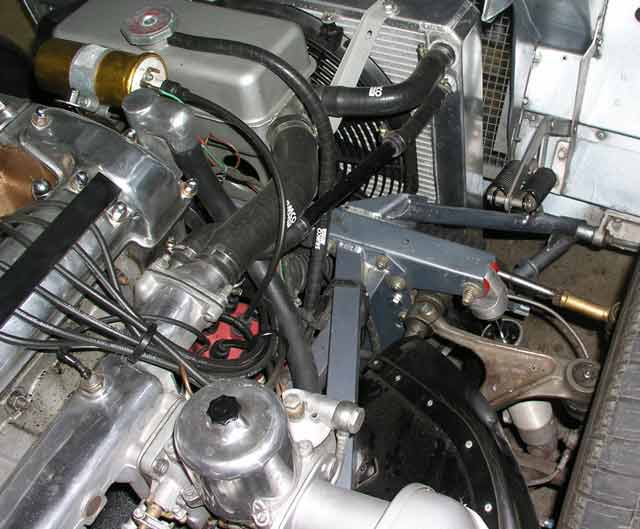
I have to order some new outer tie rod end boots, as mine came back from the rebuild all torn up. I also need to call the shop who rebuilt my rack and let them know the gyrations I had to go through to get this sorted out. It seems odd that they’d ship it back to me so loose on one side. :\
Next I have to go back to the alignment shop and have them reset the toe-in.
Just a bit more fettling to do, and the car will be all ready for the Going To The Sun Rally in early September.
