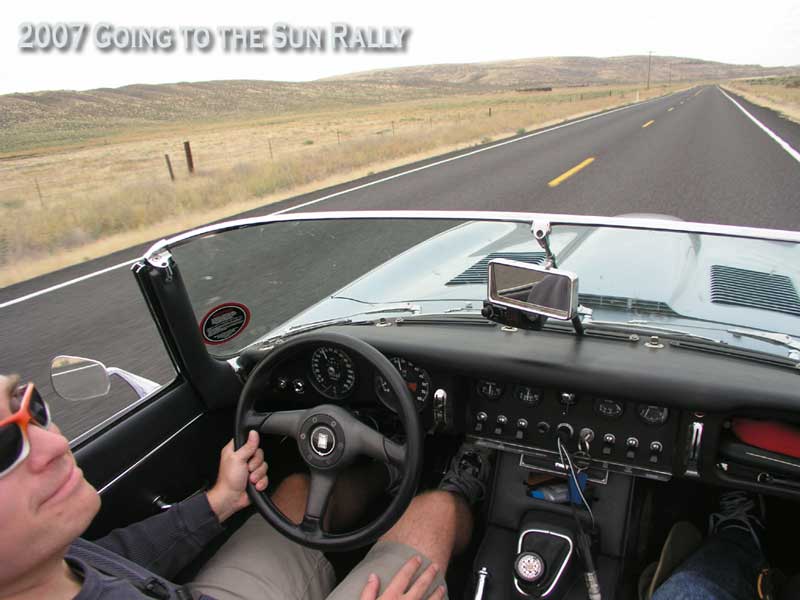
Shaun & I left Arlington after spending time in the barn finishing a mount for the webcam to make timelapse footage of the drive. (more on that later)
goolsbee.org, serving useless content from an undisclosed location since 1997
Shaun & I left Arlington after spending time in the barn finishing a mount for the webcam to make timelapse footage of the drive. (more on that later)

I saw this article in the dead-tree edition of this local “alternative weekly” paper, aptly named “The Seattle Weekly.” On the cover it showed an anime-style cartoon ilustrating Seattle’s love affair with teriyaki. As soon as I saw it, I hoped they’d give Toshi his due… thankfully they did.
When I arrived in Seattle in the early weeks of 1986 I wandered into a Toshi’s, and was served by the man himself. I love teriyiaki and the finest practitionaer of this culinary art is Toshi. Of cousre here in Seattle Teriyaki is as ubiquitous, if not more, than every other food and drink option out there, even coffee or hamburgers. So even without Toshi opening up a new place in another neighborhood every few months any more, there are still a myriad of choices for the consumer. Within a short drive of my office there are easily 25-50 Teriyaki places, all small, locally owned, and excellent.
When I was away from Seattle… my time in the UK in the mid-90s, one of the things I really missed was a good cheap Teriyaki lunch. Of course in London, ANY cheap lunch would be welcome because they just didn’t exist.. probably still don’t!
Looking for an excellent fast-food alternative? Try it Seattle-style! Teriyaki.
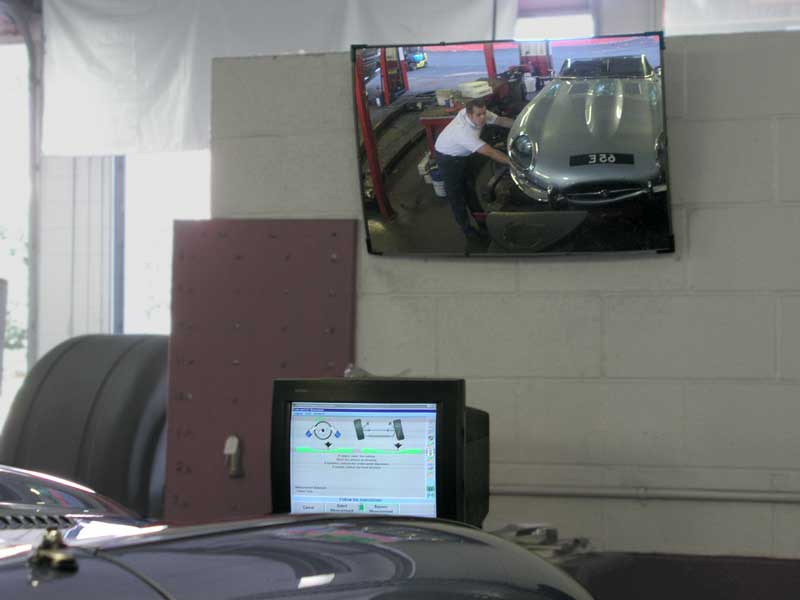
I had the front end re-aligned after I fixed that loose inner tie-rod end. The great folks at the Les Schwab store in Arlington, WA even did it for free since it was just a minor touch up and I had already paid for the complete alignment a few weeks before. The same tech did the job as the last time. You can see him in the mirror above. Jesse is his name… Thanks Jesse!
The car runs great now. Solid as a rock. No more wobbles in the front end.
Next I had to change my brake pads. I spent the weekend searching for some, and was unable to find any locally. I finally found a set online at Summit Racing. I paid for overnight shipping just to make sure they arrived on time. I went to install them last night, and of course, as is my fate with all things mechanical (ie: my steering rack that took all summer to sort out!) a two-minute-per-side job turned into a 2 hour epic struggle! The driver’s side had a pad that was unevenly worn, and one of the pots of my Wilwood calipers was stuck slightly off-kilter. No amount of wedging and struggle would get it to compress fully into the caliper housing. I finally gave up and disassembled the caliper itself and pressed it back in. Once that was done the other three pads went in relatively painlessly and quick. I’m very impressed with the design of the Wilwoods when it comes to changing pads. next time I won’t wait so long! I also will probably buy a small stock of pads as they seem, to be hard to find.
Of course the above work required draining a lot of the brake fluid from one side of the system, so they’ll need to be bled. I took a few laps up and down the driveway to test the brakes and other than a bit of sponginess (which will go away with bleeding) the brakes felt great. I’ll try and get the bleeding done as soon as possible and go bed the new pads in good later today.
The only prep work that remains is some packing and camera work. I bought two new lenses which hopefully will arrive today. Stay tuned.
I’ve also been chatting with my co-pilot for the rally, Shaun Redmond, who flies out tomorrow. You’ll meet him soon. We booked a room in Lewiston, Idaho for Friday night, and expect to be in Helena, Montana Saturday afternoon. I can’t wait to get underway!
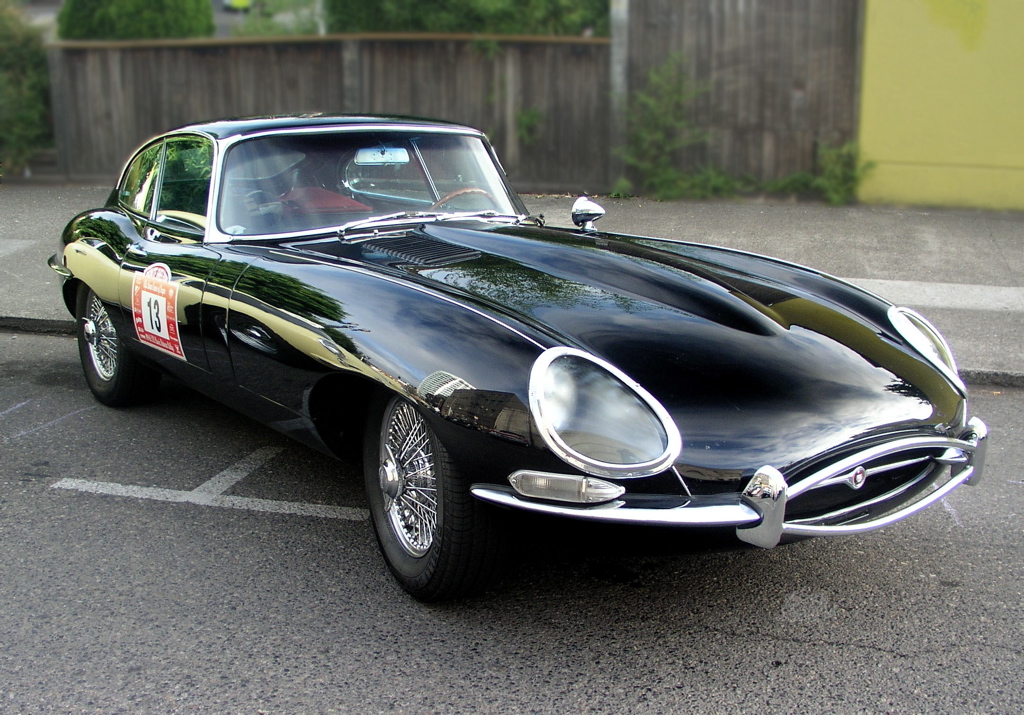
There is no mystery as to what kind of car this is, so no need for guessing games. But, being black it lends itself to mystery and danger. The ride of choice for the Italian villian Diabolik, and the color that convinced Sir William to build the coupe version of the car. The E-type was originally designed to be an open two seat car, with classic lineage to the D-type and C-type before it. Legend has it that an American panel beater employed at the Coventry factory pleaded to make a coupe, and created the iconic shape you see above. Sir William Lyons had it painted black and the rest is history. Black really lets you see the shape of the car as reflected light. It is sexy as hell if you ask me.
I’m not a fan of the coupe, but if I had one, it would certainly be black.

I’ve been REALLY busy at work the past week and a half, so please accept my apologies for the lack of updates here on the website. You can follow those links and see what has been going on, and to be honest, what you see there is merely the tip of the iceberg in many ways. For one, those articles only capture the actual work of preparing the access and moving the units, but don’t begin to describe the gyrations that went on behind the scenes with engineers, technicians, the property management folks, etc. All for moving some equipment… you would have thought we were building The Pyramids or something! For the other this is the start of a very large project. We’re expanding our capabilities by a factor of 2X… the largest such jump we’ve taken since 2001. I’m ultimately responsible for the largest project, and associated budget, that this organization has ever dealt with. That said, I’m very confident we will succeed because I have an excellent staff, who know what they are doing.
But I digress…
Today I FINALLY exported all my photos from the rally and uploaded them to my server, so now you can sit back and view them all. I usually do this before, and then use HTML links to reference them in my posts, but somehow this time I did it backwards. Want to see them? Here they are!
I hope to get the 65E’s toe-in checked, now that I’ve fixed that loose inner tie-rod end (I also have new gaiters, which arrived today from Terry’s Jaguar) early next week, because the week after next…
I’ll be driving out to Montana to run in the Going To The Sun Rally once again. My dad can’t make it this year (one of the reasons why we did these two short rallys this summer) so my friend an co-presenter at so many Macworld Expo conference sessions, Shaun Redmond will be flying up from Canada* to join me. I’m really looking forward to it and hope to surpise and delight my regular readers with some interesting stuff in conjunction with the event. Stay tuned!
* Yes, “flying UP from Canada” is correct in this context as Shaun lives in Ontario, and due to a geographic irony, is quite a ways SOUTH in relation to my location in Washington. I’ve always been a geography buff and love pointing out stuff like this. 🙂
OK, so it is a miserable rainy day here, I might as well tackle my steering (again) which has two problems:
1. It was recently rebuilt, but has free play on the inner tire rod end on the driver’s side(?)
2. I could only get 11 of the 12 bolts that mount it to the car installed last time.
I don’t know what caused #1. BUT I just discovered the cause of #2… ME. I am an idiot.
I thought maybe the fresh paint on the rack prevented the bolt from going through the hole, but indeed it was all my fault. Now that the rack in on my workbench it is plainly obvious that the driver’s side MUST be bolted first. The passenger side bolt hole on that particular bolt, is elongated. Guess which one the Moron Mechanic here did first?
That problem sorted (I still removed the paint just for good measure) I’m on to the inner tie rod end.
The free play is hard to describe, so I took some movies. Of course, it takes two hands to show the free play and one to hold the camera. I only have two hands… so the camera was hanging from my neck and wobbles even more than the tie rod. Thankfully there is sound so even if you can SEE it wobble, you certainly can HEAR it. You will need “QuickTime” to view these short movies (made with my still camera).
First, here it is on the car: Inner Tie Rod Wobble on the Car.
Here is another try at an ON-Car look: Inner Tie Rod Wobble On Car.
Here it is off the car and on the workbench (sorry, the camera wobble is REAL bad!) with the tie rod boot removed: Inner Tie Rod Wobble Off The Car.
I THINK I just need to bend back the lock tabs and tighten this puppy up, re-bend and I should be good to go… The problem is, those nuts are HUGE. I have no wrench, even adjustable ones that are this large. 🙁
Update: 2pm I grabbed a kid to hold the camera, so here is a MUCH better, no-wobble movie of the wobbling inner tie rod end.
Update: 5pm I went to a hardware store and bought a GIANT adjustable wrench. It, plus my largest previous adjustable allowed me to get the nuts off and adjust the wobble out of the inner tie rod end. Whoo hoo!
Update: almost midnight!
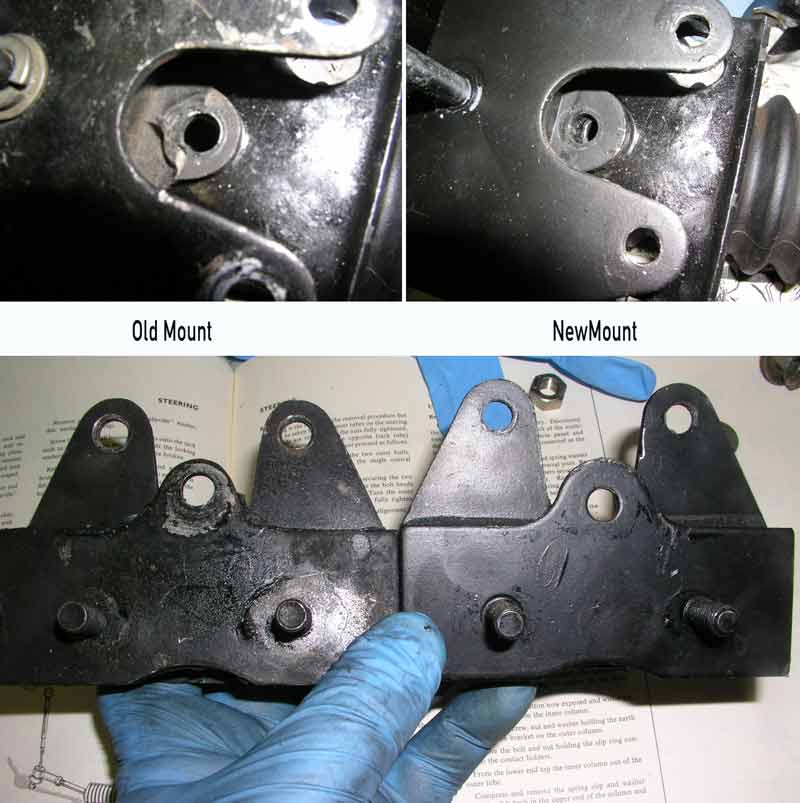
Well… I guess I’m not an Idiot after all. Take a look at that closely. You will note that my new mounts are slightly different than my old ones. What is really odd is that the passenger side one does not have this issue.. It fits fine. Go figure.
Perhaps the old rack mount has been modified? Well so has my new one now! A little time with the Dremel tool and…
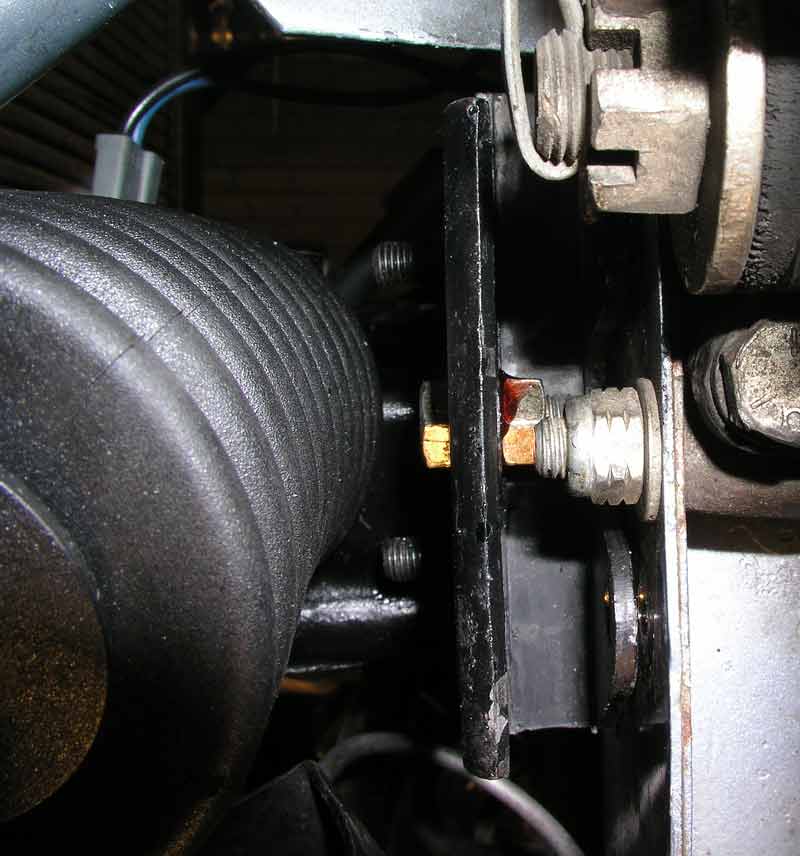
The rack goes on, and it fits to the mounts, AND the two short bolts go on. Above is the driver’s side bolt. This is the one that would not go on before. Now it fits great. No amount of juggling would allow me to get both a washer and a nut on that bolt, so once I got the nut on, I placed a drop of thread-locker on there for good measure and tightened it up. But of course not before I did this:
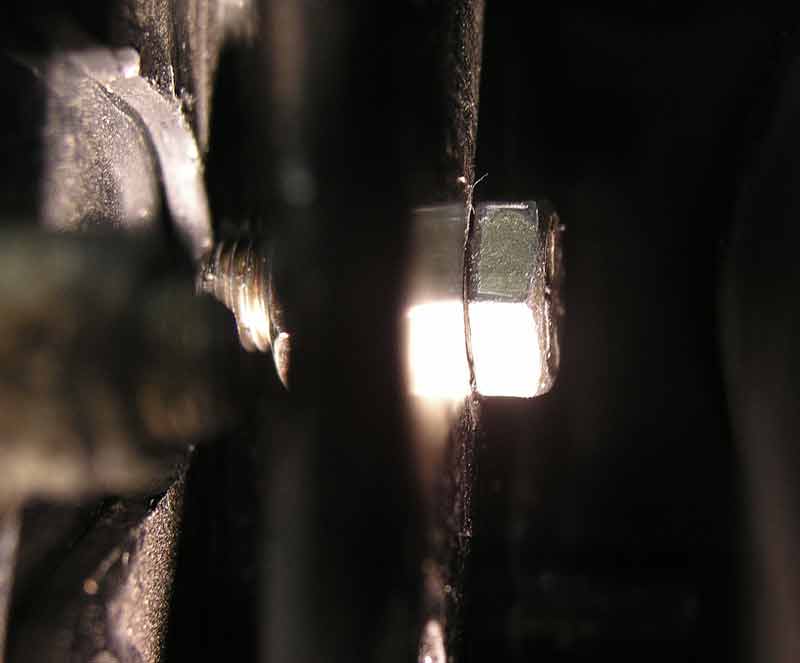
That is the passenger side short bolt. I didn’t tighten ANYTHING until after I got both of these damn bolts back on. Then I tightened them, driver’s side first. Then the back long studs got bolted, then the four front short studs, then the four safety bolts. The last one of these, the long one on the driver’s side was a real PITA to get back on, but it eventually went in.
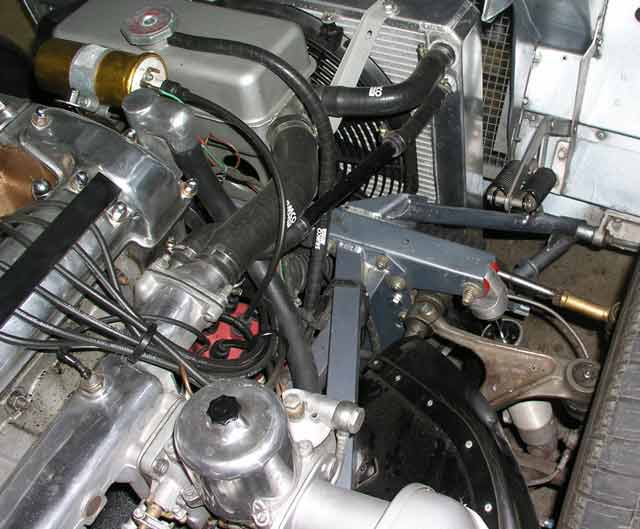
I put the radiator fan back on, the outer tie rod ends on, the wheels back on… then dropped the car back down to earth again. Unfortunately it was very dark and too late for a test drive. Oh well. Maybe later this week.
I have to order some new outer tie rod end boots, as mine came back from the rebuild all torn up. I also need to call the shop who rebuilt my rack and let them know the gyrations I had to go through to get this sorted out. It seems odd that they’d ship it back to me so loose on one side. :\
Next I have to go back to the alignment shop and have them reset the toe-in.
Just a bit more fettling to do, and the car will be all ready for the Going To The Sun Rally in early September.
I *hope* this will be a tough one, but goodness knows… maybe Roger and Paul have each owned three.