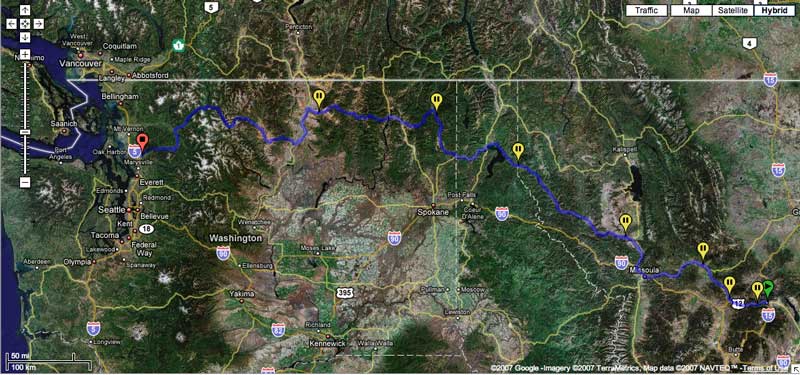
Monte Shelton Northwest Classic Rally, Getting There.

300sl at sunset

My father and I are heading down to Oregon to run the Monte Shelton Northwest Classic Rally in the 65E… which of course I am still reassembling. The steering rack arrived Monday. I put it back on the car Monday night, but then issues at work prevented me from finishing the job, which requires a full front end alignment.

I plan to leave for Portland on Thursday morning as the Rally has a Welcome Reception and (more important at the moment) Technical Inspection of the participant’s cars at 6pm Thursday at Monte Shelton Motors in downtown. Thursday morning I bring the car to Les Schwab’s store in Arlington for some time on the alignment rack. The mechanic is half the age of the car, or less! He’s a bit intimidated but with some help and encouragement from me he gets the job done. One issue comes up… my freshly rebuilt steering rack shows some free play on the inner tie rod end on the driver’s side(!) This prevents the toe-in from being set accurately – but the car is as close as it can get.

on the alignment rack

I drive off towards Seattle to pick up my dad. The car feels great. I can feel the loose left front on occasion, but overall it is in much better shape than before. No more steering wobble at higher speeds. Mom & Dad have been visiting my little sister and her family the past few days. I find their hotel and pick up dad, and we say good bye to my mom, who will be off to my house to visit Sue & the boys. We drive down I-5, stop at my office, then continue on to Portland. The car, which refuses to allow the right turn signal to operate the whole way south to Oregon, comes to its senses and operates perfectly for the Technical Inspectors. Go figure!

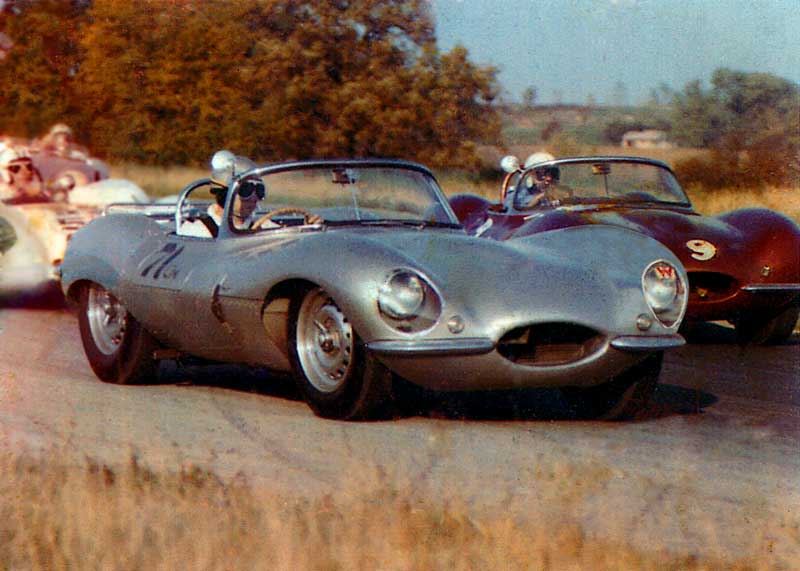
The collected cars for the rally are quite nice. LOTS of Alfa Romeos, as would be expected for an Alfa club rally. Several E-type Jaguars too. Three series 1’s, a bunch of 1.5’s and one series 3. The latter has a six-weber carb setup, which I think looks so much better than the original factory quad-Stromberg.

s3 v-12 with 6 Weber carbs

We pass inspection… yeah!

I pass the evening reception looking at, and photographing cars. Enjoy:

Can Am Poster at Monte Shelton Motors

The last image above is a poster from the old Can Am series on the wall at Monte Shelton Motors.

Nice Rack!

Nice Rack!

The rebuilt steering rack for the Jaguar arrived today!

Of course, I have a vintage rally coming up THIS WEEK… Thursday to be exact. That means I have three days to get the rack back on and align my front end. I drove home … stopped at John’s for more veggie oil… grabbed 55 gallons… enough to fill my newly constructed settling tank that I made Sunday… but I digress.

I immediately went to the barn, reinstalled the tie rod ends as close as I could to where they were before the rack went off to Terry’s Jaguar for rebuilding. Then I started to re-install the rack. Well… I finished reinstalling the rack… 4 hours later. Man… a lot harder to get it back on than take it out!

Getting it aligned and on the pegs was the first challenge. The next one was getting the bolts back in.

The rack is held on by 12 bolts. 6 are built into the mounts. 4 are safety bolts that hold the rack on, even if the mounts break. 2 short bolts run through the rack and mount, without touching the car frame. One of those last two bolts JUST WOULD NOT GO ON. It is still on my workbench. I’m hoping that having 11 of 12 on there will be enough to run for a couple hundred miles. What say you Paul?? Can I drive like this, or so I need to pull the whole damn thing out and do it again?

I plan on doing that anyway before I do the Montana Rally in September, but I really would like to avoid it between now and Thursday!

Anyway, It is back in and down on the ground again. Hopefully I can sneak away from work early one tomorrow or Wednesday and work on aligning the front end toe.

All my (updated) photos are here.

Better Living Through Chemistry.

I love having interesting friends with knowledge about stuff I’m clueless about. Tonight I was provided with a Chem 101 class via iChat. My good friend, occasional comment provider here, and real live trained professional Chemist, Dan O. was the professor and I the student. Over the course of three hours I learned more than I ever have about a handful of chemicals I NEED to know about if I ever want to achieve some measure of energy independence.

The conversation started when I mentioned my initial test of a batch of veggie oil in preparation for making BioDiesel. I was having trouble doing the tests. The primers on BioDiesel prep were not written in a way that I was comprehending very well, and there was some inconsistencies from one write-up to another. Dan cleared it all up for me. His intimate knowledge of all the elements, processes, and reactions involved allowed him to explain it to me in terms I could grasp.

He also filled me in on some safety procedures, storage strategies, and other bigger picture items sorely lacking from the reading I’ve done to date. I started the evening a bit frustrated, and finished it feeling more confident and motivated to start again.

Thanks Dan!

Thumb twiddling…

bonnet cleaning

I can’t drive the car and I can’t really work on it either… so I might as well clean it. I had it pretty clean before, but the second day of the Classic Motorcar Rally in June was done on a miserable rainy day (I need to post photos from that at some point!) and the car got filthy. So I spent a rainy weekend a couple of weeks ago scrubbing wheel wells, cleaning wheels, and since I have the bonnet unshackled from the frame, scrubbed areas which are usually impossible to reach. Hard to see in the photos above due to the flash but they are sort of a before and after shot… I scrubbed the area that gets pelted by the debris from the front tires, with brushes and sponges… then rinsed it off with a swipe from the pressure washer.

rear wheel

I also flossed the wire wheels… always a pain in the ass.

Of course the weather has turned wonderful again… all I can do is wait while my steering rack get rebuilt.

Fame & (a very small) Fortune.

rainbow

I clicked over to the SNG Barratt website this morning to check on something and was confronted by my own car. I grabbed the screenshot above (which required some work as they change the image every X seconds with a script or something) and decided to post it here for posterity. I’ve blurred out the boring stuff around the edges. 😉

I have my fancy air filter setup as “reward” for this work I did for SNG. Not a bad exchange.

The photo was taken on my VERY FIRST DAY of E-type ownership. I had picked up the car in Colorado and was driving it home to Washington with my son Nicholas. You can read the whole story of that wonderful four-day roadtrip on my old website.

It works.

processor

I finally finished all the barn project work. I have this processor seen above, a dual-tank wash system, and new this weekend – a bottom draining settling tank. With a stop at my Diesel buddy John’s house on my way home Friday night I picked up enough WVO to finally finish calibrating the processor. It turned out to be a lot of work. However, as of about 10pm tonight I know that it all functions properly. The pump works. The heating element works. The plumbing doesn’t leak. The settling tank works. The mist washer works. I’m ready to go B100! Reduce the Goolsbee family’s dependance on petroleum to near zero. (The Jaguar will still need gasoline, but I don’t drive it as much as even I’d like to!)

I was hoping to get an initial batch made, but that will have to wait. But I’m happy to have all the construction work done. I’ll likely make a few more settling tanks at some point… mostly to replace the filtration system I was using before. The steel barrels can just be used for storage after that. I have a source now for free poly barrels and this bottom draining system is a lot better than the siphoning I was doing before. Faster, cleaner… way better overall.

Here is how it works. The barrel is fitted with two drains in the bungs. One flush with the bottom, but the other with a six inch pipe extending up into the tank. Both drains come out of the bungs and bend 90-degrees, then out a foot long pipe to a ball valve. I cut a hole in the bottom of the barrel, which is now the top, and place a funnel in it to pour the oil into the barrel. The water and crud settles to the bottom of the oil naturally. The pipe with the six inch extension goes up above the water and crud. That way you can drain the clean oil out of the barrel above the level of the water and crud. Very handy. Once the accumulated crud reaches six inches (visible through the translucent poly barrel) you drain it off into a bucket from the other ball valve.

Before I settled in two poly tanks (now my washing system) and would siphon as low as I could from them into my filter barrels. It was easy to see the water at the bottom, but as it accumulated the system got harder to use. When I retired the first barrel to make it my wash tank it had easily 20 gallons of cruddy watery gunk at the bottom. It was a pain in the ass to get down from the platform and out of the barn. Now I’ll never accumulate more that about 5 gallons of water. I can drain it off as it settles.

I’ll post pictures of the whole thing soon.